
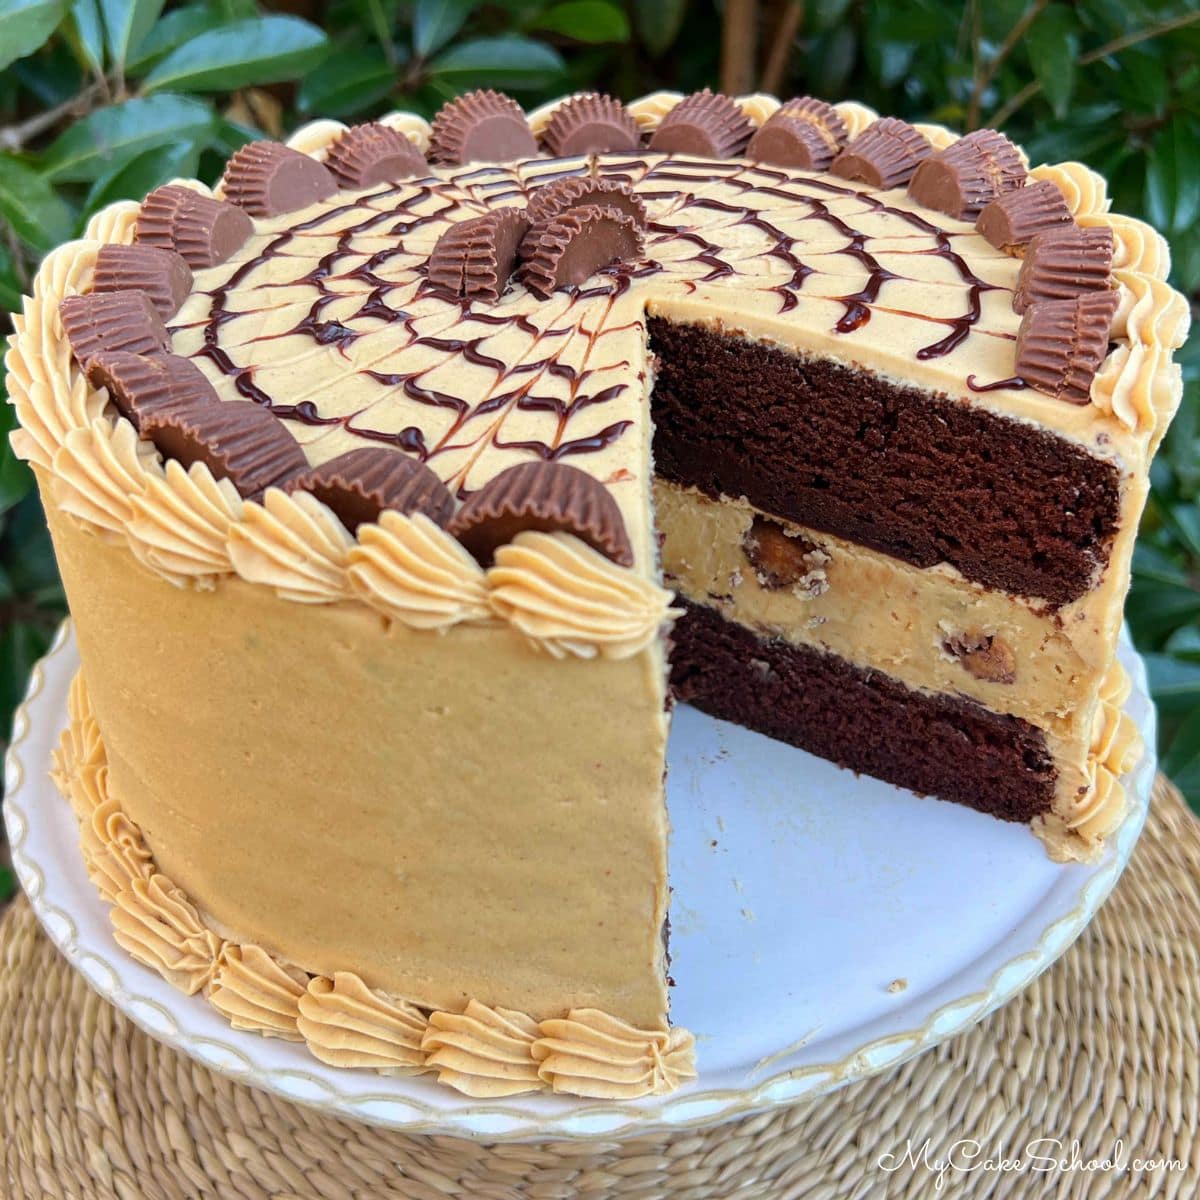
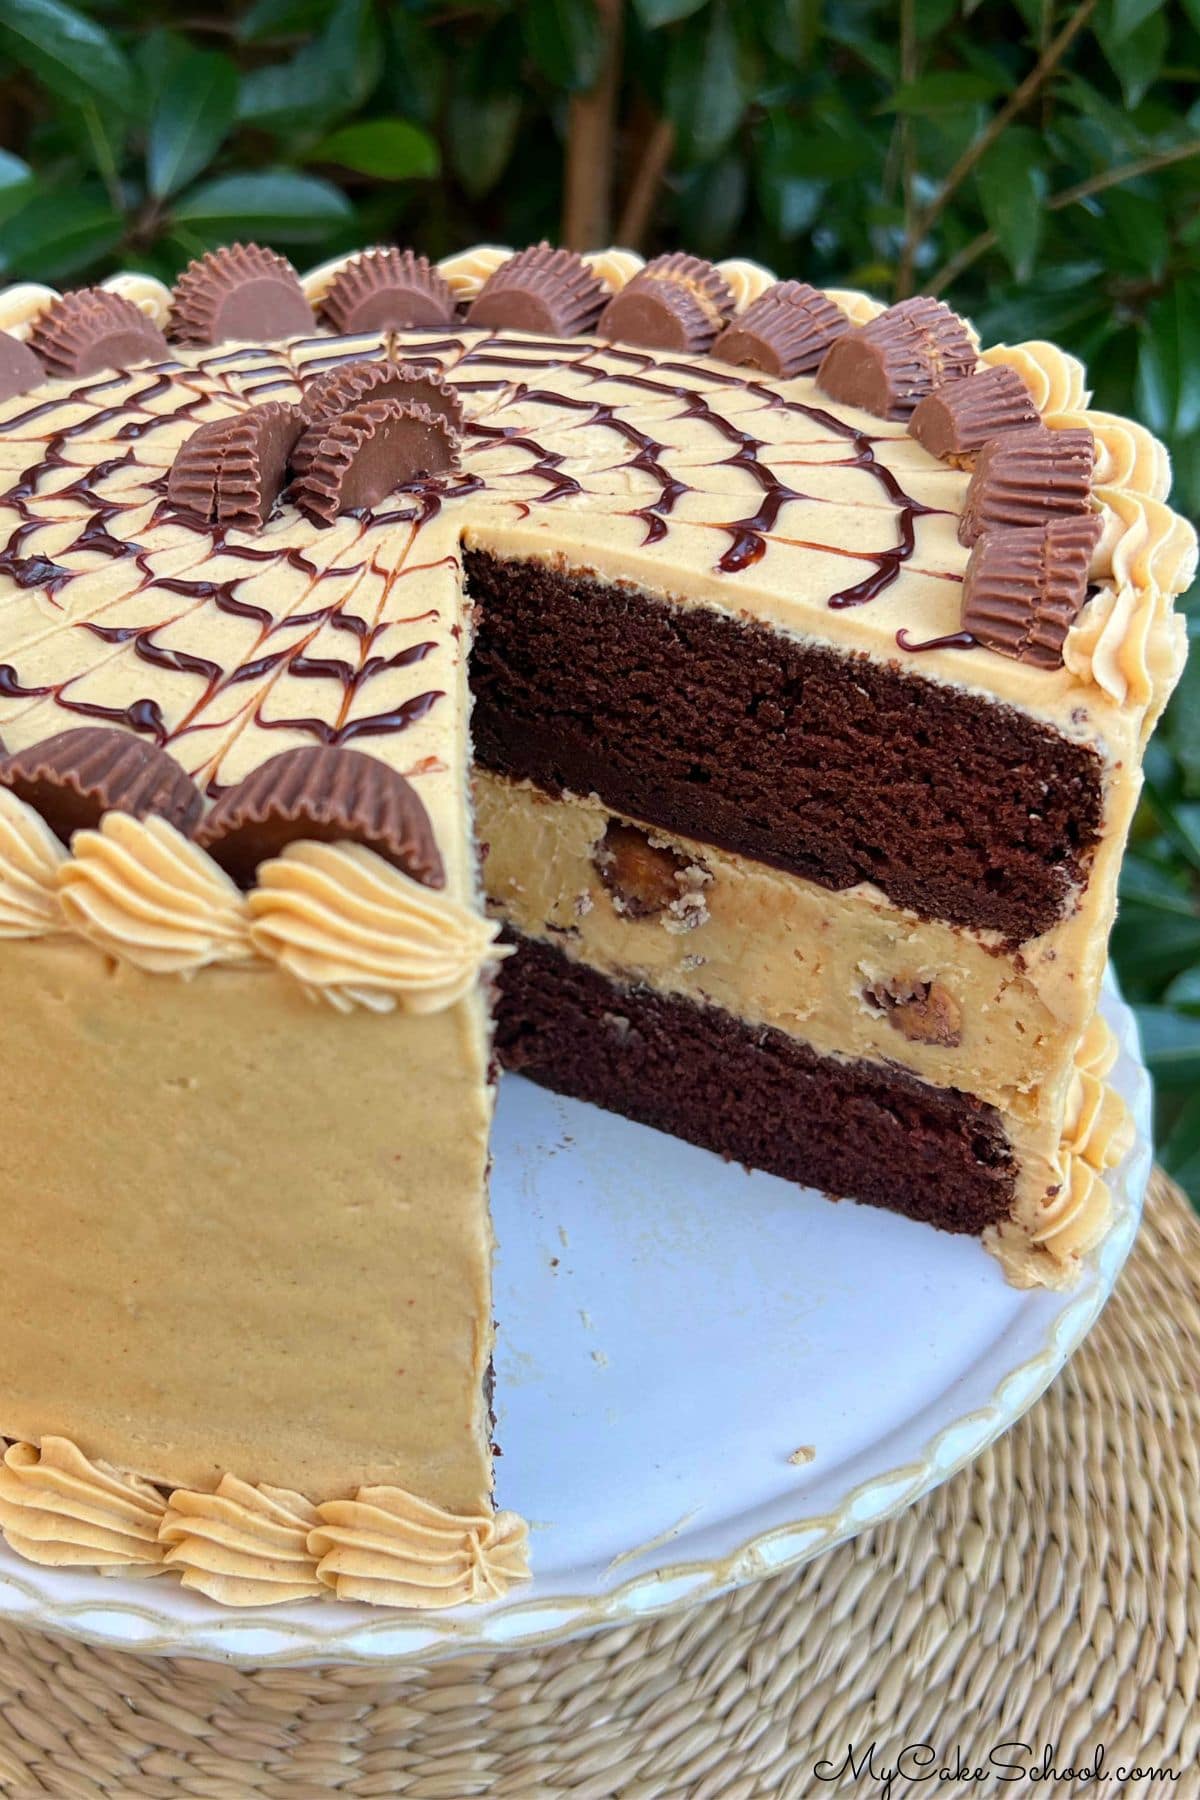
This decadent Chocolate Peanut Butter Cheesecake Cake is each bit as scrumptious because it sounds. Moist, tender layers of home made chocolate cake encompass a creamy layer of peanut butter cheesecake on this spectacular dessert. Hold this recipe in thoughts in your subsequent special day!
We have made many cheesecake muffins over time, together with Lemon Cheesecake Cake, Pink Velvet Cheesecake Cake, Strawberry Cheesecake Cake, and extra. These muffins are so distinctive, style wonderful, and simply really feel a bit extra particular!
Easy methods to Make Chocolate Peanut Butter Cheesecake Cake
Yow will discover the full, printable recipe on the backside of this submit. Here’s a take a look at our steps!
Cheesecake Layer
- First, make the peanut butter cheesecake layer. It’s a quite simple to make, but it surely wants loads of time to sit back and agency up.
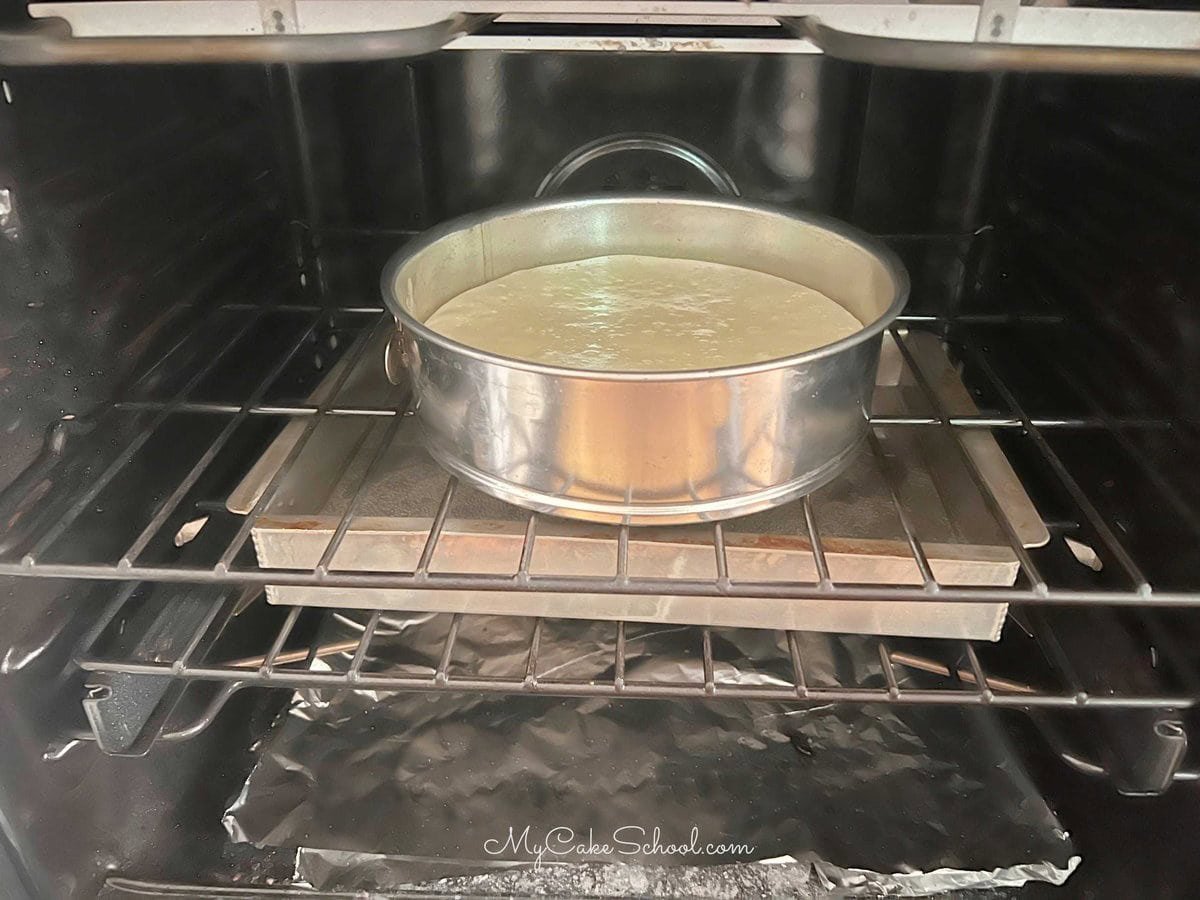
- Water Tub: Some bakers wrap the underside of the springform pan in foil and bake it in a water tub. Nevertheless, this alternate methodology works very effectively!: Place a 9×13 or roasting pan crammed with about an inch or so of water within the oven on a decrease rack and Preheat to 300 levels F. Doing this step helps to advertise even baking.
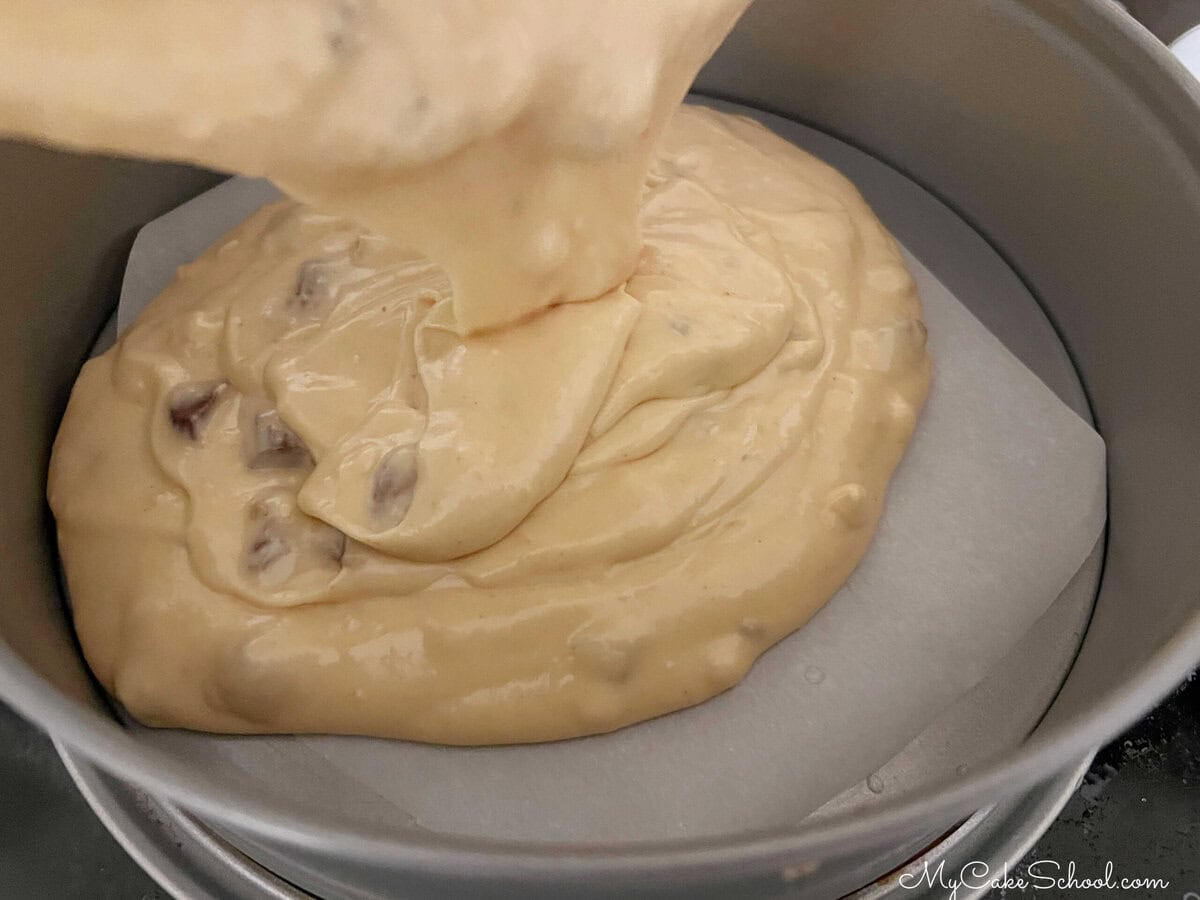
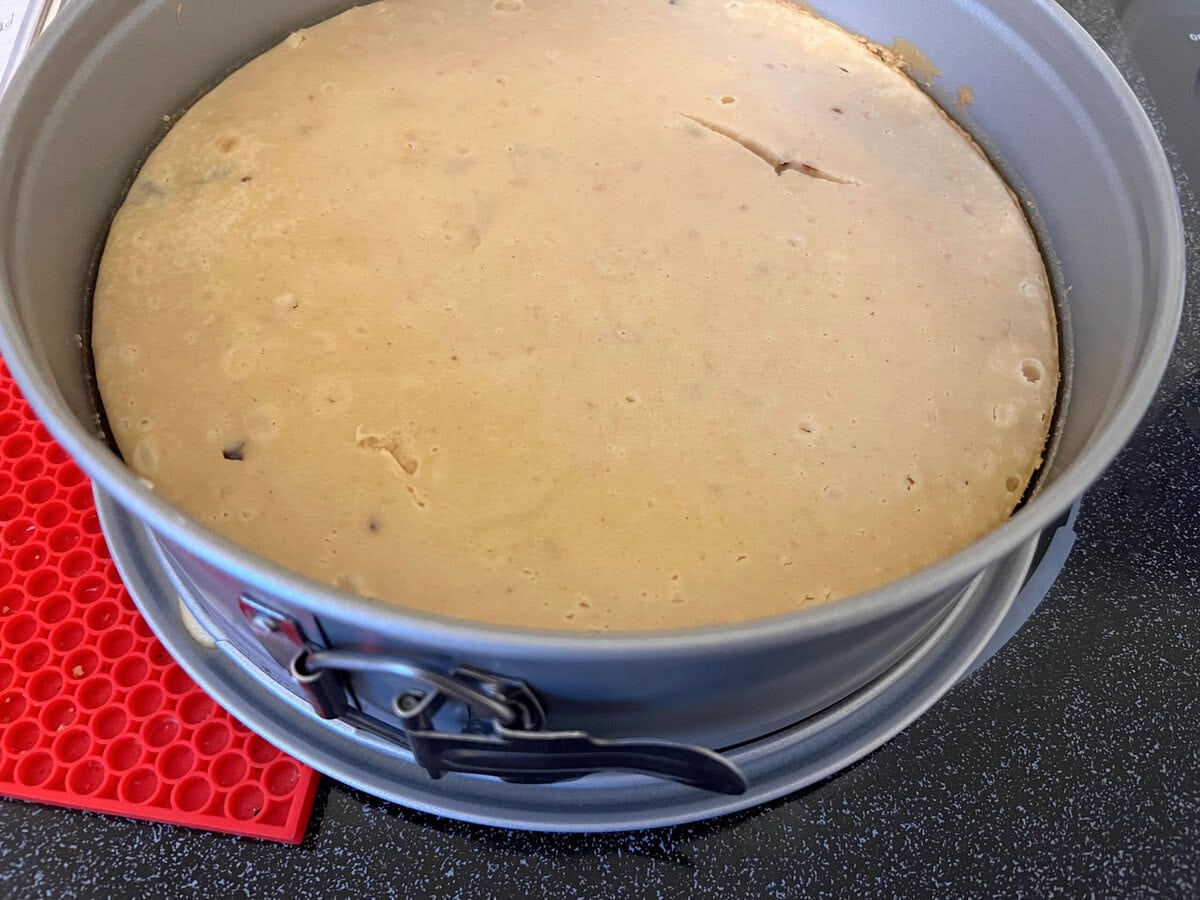
- Baking the Cheesecake After mixing up the cheesecake batter, pour it into the parchment lined 9-inch springform pan, and place it on the rack simply above the water-filled pan to bake. (Within the preheated 300F oven, it should take about 40-45 minutes).
- Then, flip the oven off, and permit to chill with the door cracked for one more 20 minutes. This step is meant to assist stop cracking. (In case your cheesecake develops a crack, don’t worry, no one would ever know as soon as crammed and frosted!)
Cake, Frosting, Glaze
- Whereas the cheesecake is chilling, you may put together the chocolate cake layers, easy ganache glaze, and peanut butter frosting.
- Since our cheesecake is baked in a 9 inch springform pan, we baked our chocolate cake layers in 9 inch pans as effectively.
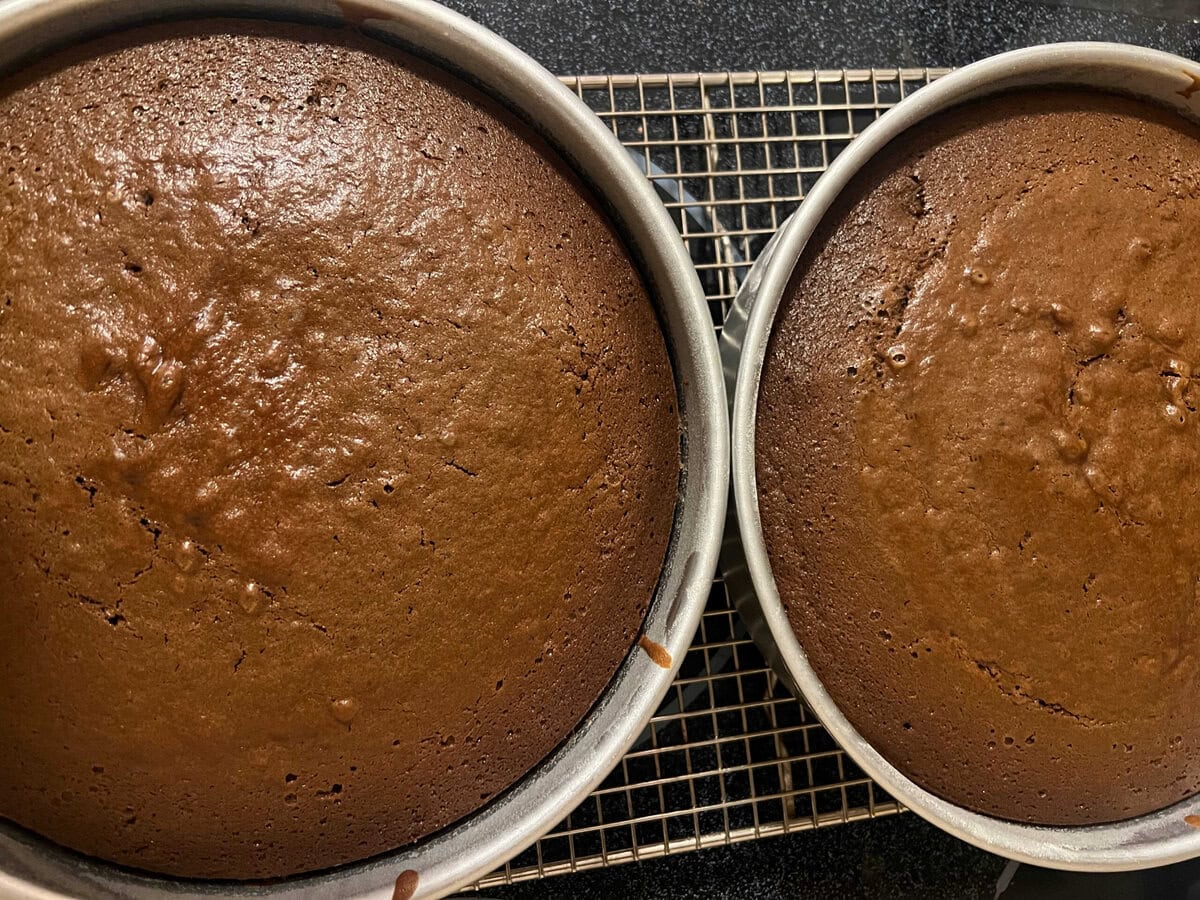
- Flip the freshly baked layers out of the pans after about 8-10 minutes of cooling. They should cool fully earlier than assembling the cake. (We normally flip our layers out onto cardboard cake circles wrapped in foil. Then, we wrap the layers individually with plastic wrap and freeze till it’s time to put the cake collectively).
- Chocolate Glaze & Frosting– We ready a easy ganache glaze of chocolate & cream within the microwave. That is nice for including richness. We drizzled some between the cake layers throughout meeting, and in addition used this for adornment.
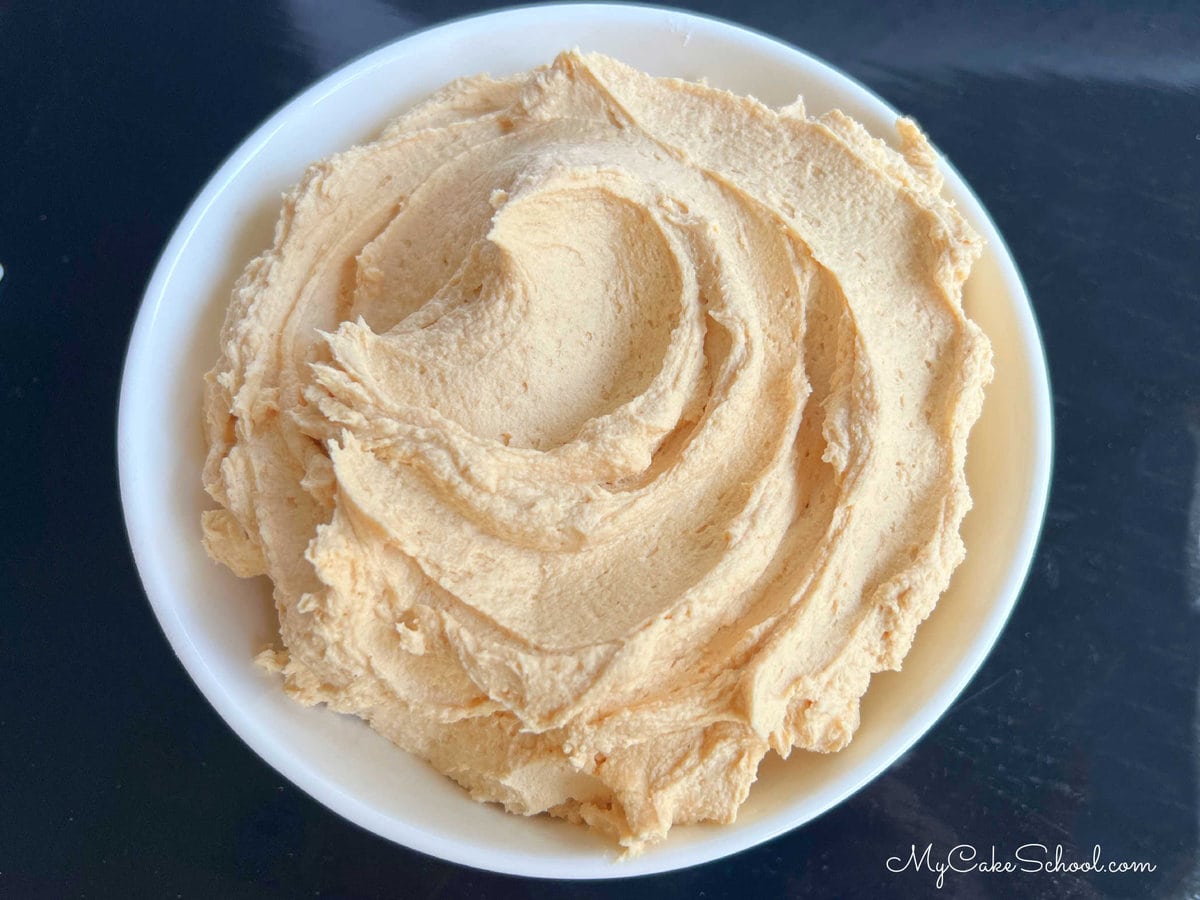
- Our frosting is our favourite peanut butter buttercream. It comes collectively very quickly, has nice peanut butter taste, and is really easy to work with. We use a small quantity in between our cake layers, and frosted the cake with it as effectively.
Assembling the Cake
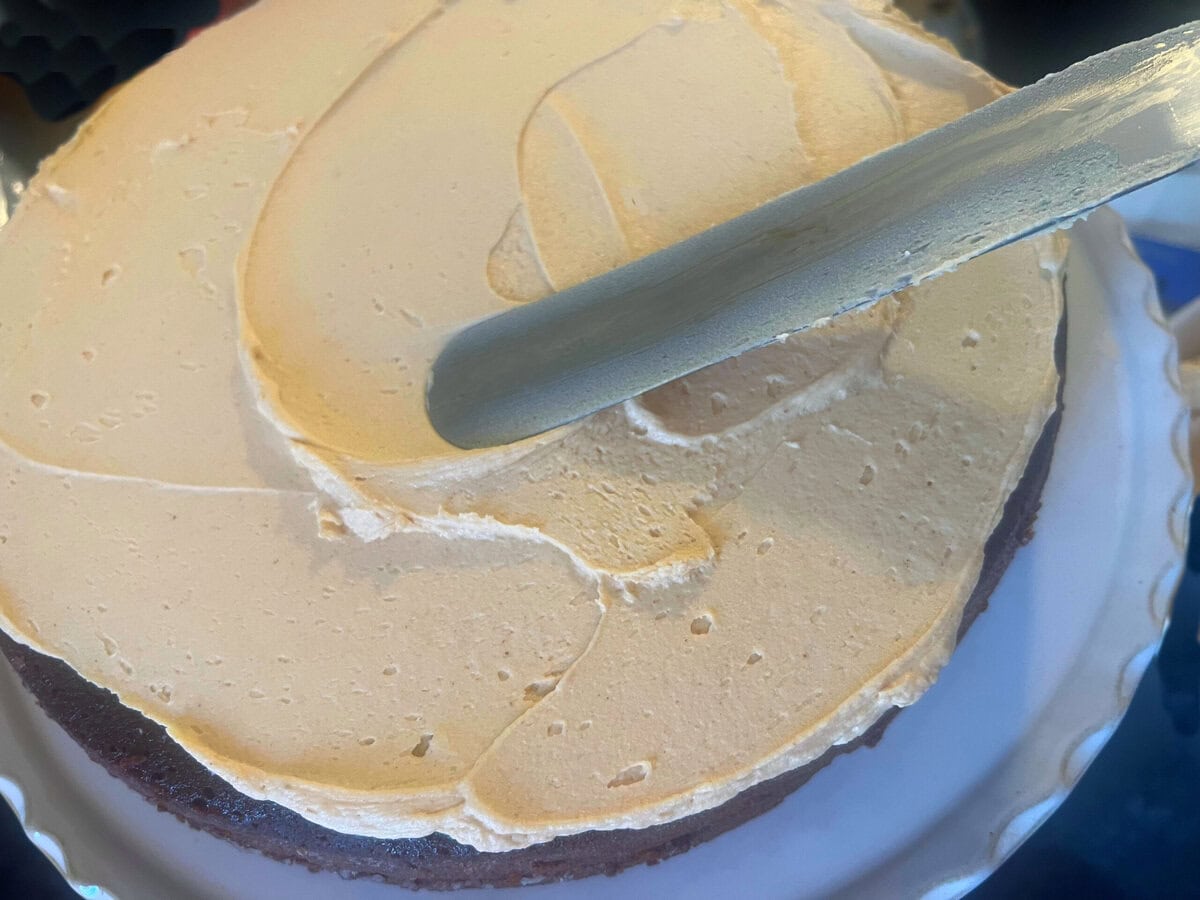
To assemble the Chocolate Peanut Butter Cheesecake Cake, we first positioned a cooled chocolate layer on the pedestal and unfold it with a skinny later of frosting.
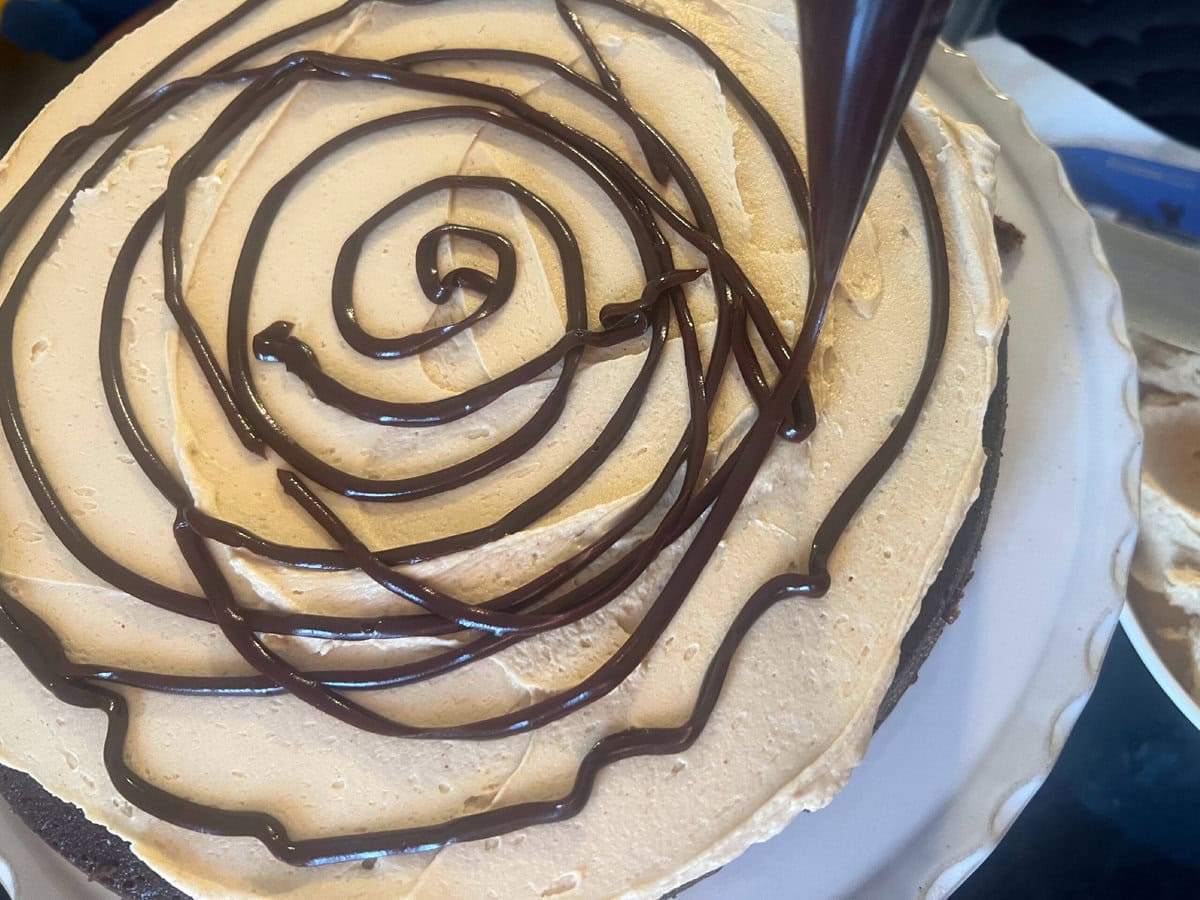
Subsequent, we drizzled the highest of the frosted layer with chocolate ganache, utilizing a disposable piping bag with the tip snipped away.
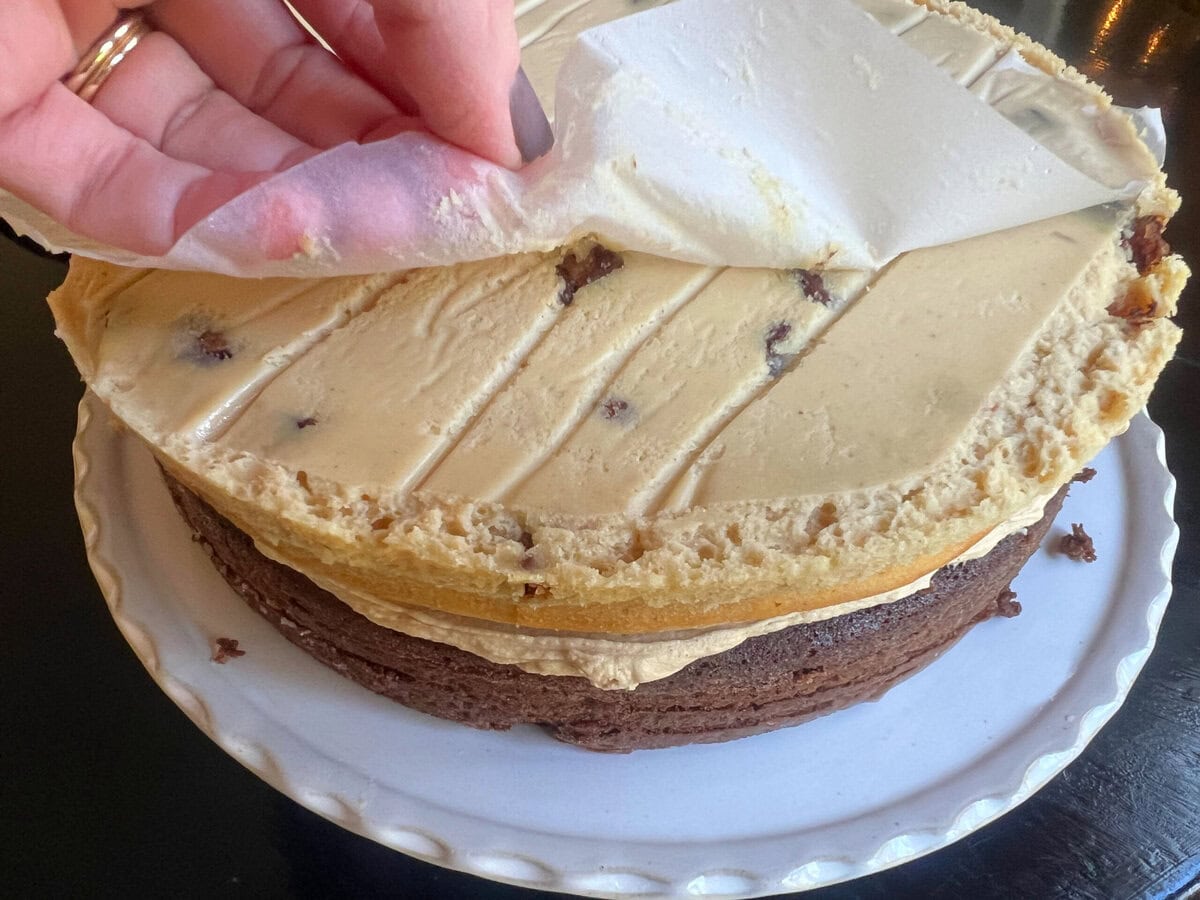
We topped that with the chilled peanut butter cheesecake layer. (Right here I’m peeling away the parchment paper that lined our pan!) Remember this step ;0)
Subsequent, we unfold the layer with a skinny layer of frosting, drizzled with chocolate, and topped with the second chocolate cake layer. Frost the highest and sides of the cake as typical!
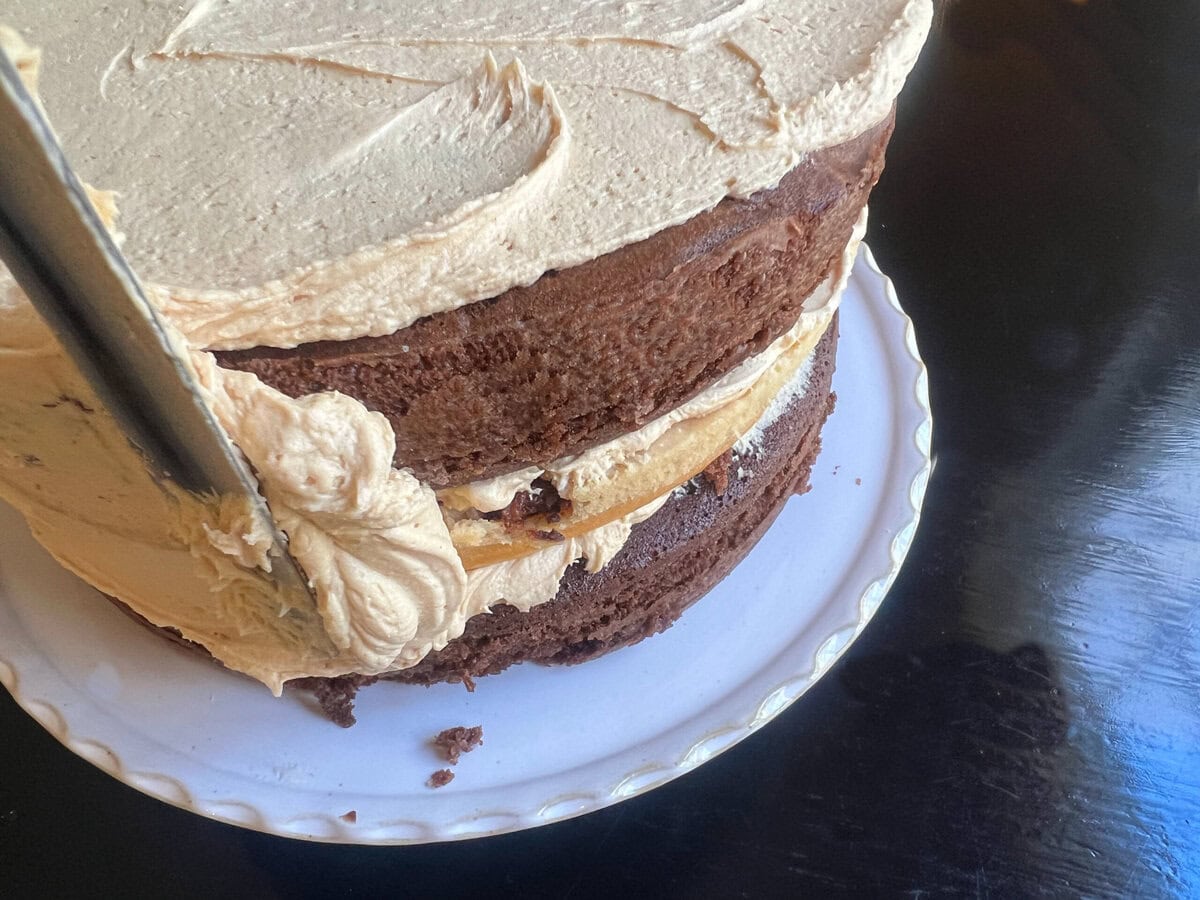
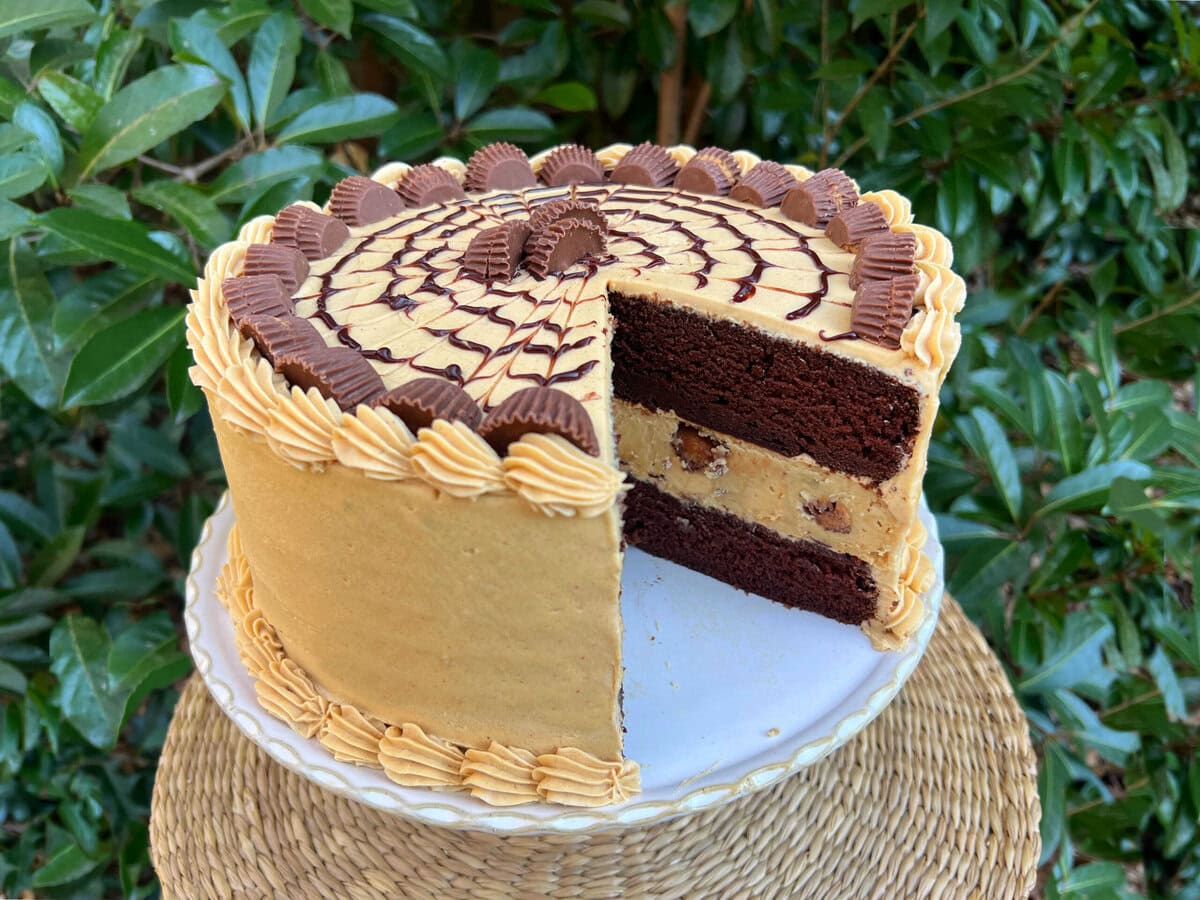
Embellish the cake nevertheless you want. We topped ours with chocolate glaze, piped a shell border, and sliced Reese’s Cups. This cake is SO good- and it appears so fairly when sliced. Time to dive in!
Extra Peanut Butter Desserts
We have made a number of muffins with peanut butter, or peanut butter & chocolate over time! Listed below are just some of our favorites:
We hope that you simply take pleasure in this recipe as a lot as now we have! Should you give it a strive, be sure that to depart a remark under!
For the Chocolate Cake Layers
Peanut Butter Buttercream
For the Peanut Butter Cheesecake Layer
-
Place a 9×13 (or comparable measurement) pan crammed with one inch of water on a rack within the backside ⅔ of the oven. (Slightly below the rack the place your cheesecake layer will bake)
-
Preheat oven to 300 levels F
-
Line the underside of a 9 inch spring kind pan with a circle of parchment paper.
-
In a mixing bowl, combine softened cream cheese till easy at low velocity. Then, add the peanut butter and blend till mixed. (We used a stand mixer however handheld is okay additionally).
-
Persevering with at low velocity, combine within the sugar, salt, flour.
-
Add bitter cream and milk. Combine at low velocity till easy and integrated. Add eggs separately. Combine till effectively mixed. Gently stir in chopped Reese’s Cups.
-
Pour the cheesecake batter into springform pan lined with parchment and place on a rack simply above the pan of water.
-
Bake for 40-45 minutes. The cheesecake needs to be set at this point- it might jiggle barely.
-
Flip off the oven and depart cheesecake inside for 20 extra minutes with the oven door barely open. (This helps the cake to chill with out cracking.) Nevertheless, if a crack kinds, don’t fret, it will not present when assembled.
-
Enable the cheesecake to chill on the countertop. Then, place foil on the pan and chill within the freezer for 2-3 hours. If you’re not in a rush, you may refrigerate the cake for 5-6 hours or in a single day.
For the Chocolate Cake Layers
-
Preheat oven to 350 levels. Grease and flour two 9 inch cake pans. We additionally like line the underside of the pan with a circle of parchment paper.
-
Flour Combination: In a medium sized bowl, mix the flour, cocoa powder, baking soda, baking powder, and salt. Whisk 30 seconds to mix and put aside for later.
-
Place the softened butter within the bowl of your mixer. With the mixer on medium velocity, combine the butter till easy. Add the vegetable oil and vanilla. Then, add the sugar and blend for 4-5 minutes till lightened and fluffy.
-
Add the eggs separately, mixing after every egg simply till the yellow of the yolk has blended. Scrape down the perimeters and backside of the bowl as wanted.
-
Mixing on low velocity, alternately add the flour combination with the milk and the bitter cream. (We added a few third of the dry combination, adopted by the bitter cream, then the following addition of flour combination, adopted by the milk, after which the remaining flour combination.) Combine till *virtually* fully blended.
-
Slowly add the extremely popular espresso to the batter and blend till mixed (roughly 20 seconds).
-
Divide the batter between the 2 ready cake pans. Bake at 350 F for 25-Half-hour or till an inserted toothpick comes out clear or with a number of crumbs connected.
-
Enable the baked muffins to chill of their pans on a cooling rack for 8-10 minutes earlier than turning out.
For the Glaze
-
Mix the 4 oz. semi-sweet or darkish chocolate and three oz. heavy cream in a microwave protected bowl. Warmth within the microwave in small increments (30 seconds or much less), stirring sometimes in between, till the chocolate is sort of fully melted.
-
Then, enable to take a seat a minute or two and gently stir to soften any remaining items of chocolate. Cool the ganache to desired consistency for dripping. We like to use the glaze utilizing a disposable piping bag with the tip snipped away.
For the Buttercream
-
Within the bowl of your mixer add the butter and blend on medium velocity till the butter is softened and easy. Add the peanut butter and blend till blended.
-
Regularly add the powdered sugar alternately with the milk. Add vanilla. Combine on medium velocity 4 to five minutes till easy. ***Peanut butter manufacturers labeled “Pure” that now we have tried do not work as effectively with this recipe as a result of the consistency is not as easy & creamy. We have used Jif & Peter Pan (Creamy) with good outcomes!
Assembling the Cake
-
Place the primary cooled cake layer on the cake plate or pedestal. Unfold with a skinny layer of peanut butter frosting. Optionally available- Drizzle excessive with glaze (we did not use a whole lot of glaze, simply sufficient so as to add some extra richness).
-
For the cheesecake layer, run a skinny knife (I prefer to warmth it with scorching water) between the cake and facet of the cake pan to assist stop sticking. Launch the perimeters of the springform pan.
-
Place the cheesecake the other way up onto the primary cake layer. take away the underside of the cake pan. If it sticks in any respect, use a skinny, scorching knife to slip between the pan and the cake to launch.
-
Take away the parchment if you have not already ;0)
-
Unfold the cheesecake layer with a skinny layer of frosting. Drizzle with a few of the chocolate glaze for added richness (elective). Prime with the second chocolate cake layer.
-
*In case your cheesecake layer is barely wider than your cake layers, simply trim away the surplus with a scorching, sharp knife.
-
Frost the cake as typical. After the primary skinny layer of frosting, we like to sit back it within the freezer for about 10 minutes to agency all the pieces up earlier than making use of the ultimate layer of frosting. (That is elective however helps with sliding).
-
Apply the drizzle on top- adorn nevertheless you want! We adorned ours with chocolate drizzle and sliced Reese’s Cups. We additionally used a small star tip 21 for a high border. (See notes for extra particulars in case you’re within the chocolate sample we made.)
-
This cake needs to be refrigerated.
Should you should not have a springform pan, you too can make this cake by lining a 9 inch cake pan with aluminum foil. The foil ought to come all the best way up the within of the pan.
Once I’ve used this methodology, I additionally lined the underside of the pan (on high of the foil) with a circle of parchment.
Freeze the baked cheesecake, nonetheless within the pan, till firm- I left mine in a single day as a result of I wasn’t in a hurry- and when able to assemble the cake, elevate the cake out of the pan utilizing the surplus foil, peel away the wrapping from the perimeters, and flip it over onto the primary frosted cake layer.
Take away the foil and parchment, and double verify that there aren’t any remaining items of the wrapping on the cake earlier than including the following layer of frosting.
Chocolate Design: Should you’re feeling fancy, here is how we made the sample for the highest of our cake: Utilizing a piping bag with the tip snipped away, we created a spiral on high of the cake, starting within the heart and spiraling outward till we reached the sting of the cake. Then, we frivolously dragged a toothpick from the middle outward to create our design. (You may alternate instructions that you’re dragging toothpick if you would like).