

*This submit could comprise affiliate hyperlinks. Please see my disclosure for extra particulars!*
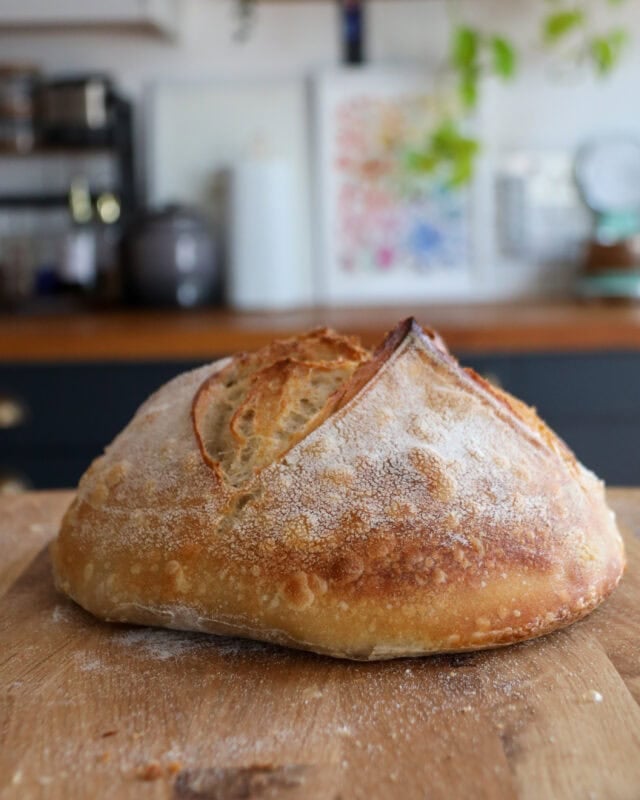
Learn how to make a easy sourdough loaf – a whole information on each stage of baking a sourdough loaf!
Sourdough can really feel intimidating at first, however when you break it down into levels, it turns into a very pleasurable (and rewarding!) course of. I’ve put collectively this easy step-by-step information to point out you precisely how I make a fundamental sourdough loaf at dwelling – no stress, no strain, simply good scrumptious bread.
Stage one: prepping the sourdough starter
Earlier than you even take into consideration mixing dough, you want an lively starter that’s able to bake with. As I typically combine my dough within the morning, I prep my starter the night earlier than. The recipe I do makes use of 125g of starter, so the purpose right here is to verify I’ve sufficient for baking and a bit of left over to maintain my starter going.
You’ll be able to strategy this in two methods:
- Maintain a big “mom starter” and take away small quantities to bake with
- Or, should you solely have a small quantity left, feed it up so you’ve gotten sufficient for the loaf and a few leftover
You by no means need to use *all* of your starter – in any other case you’ll be ranging from scratch once more (and in any case that effort, no thanks).
Feeding ratios:
Listed below are some feeding choices, relying on how rapidly you need your starter prepared:
- 1:1:1 – 50g starter, 50g flour, 50g water (150g whole)
- 1:2:2 – 30g starter, 60g flour, 60g water (150g whole)
- 1:3:3 – 20g starter, 60g flour, 60g water (140g whole)
- 1:4:4 – 15g starter, 60g flour, 60g water (135g whole)
- 1:5:5 – 15g starter, 75g flour, 75g water (165g whole)
The smaller the ratio (like 1:1:1), the faster your starter will peak. Bigger ratios take longer however are simply as efficient. Personally, I normally feed 1:2:2 the night time earlier than baking, because the timing works completely for my routine.
Watch my video on the right way to prep a sourdough starter for baking with, right here
Stage two: mixing the dough
As soon as your starter is lively and prepared, it’s time to combine the dough. Components:
- 125g lively starter
- 300ml water
- 500g sturdy white bread flour
- 12g high quality salt
Add the starter to a bowl with the nice and cozy faucet water and whisk till mixed; it ought to look barely milky. A dough whisk is nice right here, however an everyday whisk, fork, or spatula works simply high quality. Add the flour and salt, then combine till every thing is mixed. The dough will look shaggy and a bit clumpy (that is utterly regular). Cowl the bowl (cling movie, tea towel, bathe cap… something!) and go away it to relaxation for an hour.
Watch my video on the right way to combine the dough, right here
Stage three: stretch and coil folds
After resting, it’s time to construct power within the dough. There are many folding strategies on the market… that is simply what works for me. For instance, ff you blended your dough at 8am, your folds would possibly seem like this:
- 9:00am
- 9:30am
- 10:00am
- 10:30am
Personally, for the primary two units I do stretch and folds, and the second two units I do coil folds. I frivolously dampen my arms to cease sticking, then gently stretch the dough so far as it’s going to go *with out tearing*. I don’t rely folds – I cease when the dough begins to withstand.
Watch my video on the right way to do stretch and coil folds, right here
Stage 4: bulk fermentation
That is typically probably the most complicated stage, however it actually doesn’t must be. Bulk fermentation is just the interval the place the dough rises after folding. How lengthy this takes relies upon closely in your kitchen temperature, the temperature of the dough, and even typically the recipe itself. For instance, in my kitchen throughout colder months:
- Dough blended at 8am and folded by 10:30am could take till round 7-8pm to completely rise
- Dough blended within the night and folded by 8pm could take till 9-10am the following day
You need to use temperature charts or the aliquot technique as useful guides, however typically discovering out how dough works in your specific kitchen house is essential. For this specific loaf, bulk fermentation took round 17 hours, because it was particularly chilly (You begin the timer from while you combine the dough)
Watch my video on bulk fermentation, right here
Stage 5: shaping the dough and the chilly show
Shaping could be very private, and it’s okay in case your approach evolves over time as mine has even carried out. After bulk fermentation, you must:
- Pre-shape the dough and let it relaxation for about half-hour
- Do a ultimate form, creating as a lot floor rigidity as potential within the dough
- Place right into a banneton frivolously dusted with flour – personally I exploit rice flour, as a substitute of bread flour at this level.
I form by gently pulling the dough in direction of myself with the perimeters of my arms (barely damp) to construct rigidity and kind a spherical loaf. After shaping, the dough goes into the fridge: When you form within the night, you’ll be able to bake the following morning. When you form within the morning, you can bake within the night. Typically I discover the fridge stage must be 12-48 hours, however typically a minimum of 4 hours, and as much as 36 hours is greatest.
Watch my video on shaping the dough, right here
Stage six: baking the bread
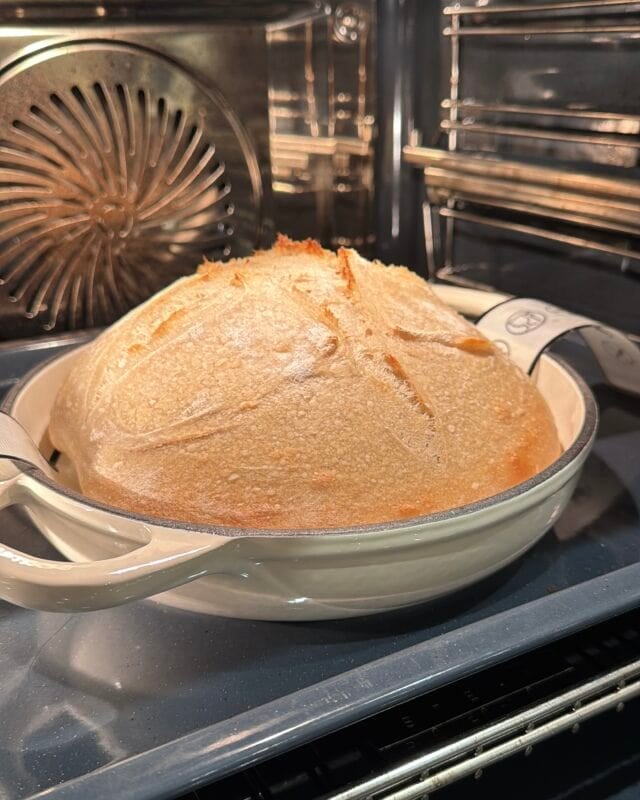
The most effective a part of this complete course of, is lastly baking the loaf. I preheat my oven (which is fan assisted) to 230ºc and preheat my Dutch oven for a minimum of 30-45 minutes. Personally I discover the pre-heating course of essential.
As soon as the oven has been preheated, and the pot you’re utilizing to bake, you’ll be able to rating the dough. An growth rating is a necessity in my books because it fairly actually permits the bread to broaden accurately and bake into the basic ‘sourdough’. You can too add ornamental scores, however that’s as much as you. For a easy loaf, I rating earlier than baking.
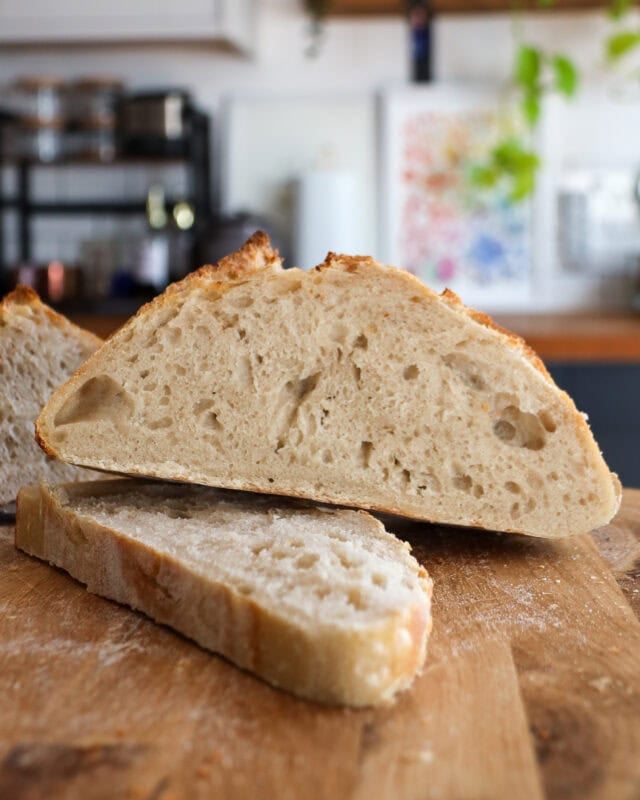
Bake the bread, within the dutch oven, for half-hour at 230°c with the lid on (I like so as to add a couple of ice cubes into the pot for steam). Then, I take away the lid, decrease the temperature to 215°c, and bake for 10-20 extra minutes till golden and baked by. The loaf is prepared when the interior temperature reaches 98-99°c. As soon as baked, let it cool for AT LEAST 1 hour earlier than slicing… slicing too early can break the bread.
Watch my video on baking the loaf, right here
Abstract
If you wish to study sourdough, please don’t be scared. There are a great deal of good instruments, movies, tutorials and so on on-line you could observe and think about to make it as straightforward as potential. There are some helpful instruments I exploit when baking with:
Any questions, let me know within the feedback!

- 125 g sourdough starter (lively and fed)
- 300 ml heat water
- 500 g sturdy white bread flour
- 12 g salt
-
Please see weblog submit/video hyperlinks for rather more element.
-
Add the lively and fed starter to a bowl, and whisk collectively till it is a milky combination
-
Add the flour, and salt, and blend collectively till it is mixed. I do that with a dough whisk, however you need to use a spatula or your arms
-
Cowl the bowl and relaxation for an hour
-
Carry out 4 units of folds, each half-hour. I do two units of stretch and folds, and two units of coil folds (see weblog submit for particulars)
-
Cowl the bowl properly, and go away to bulk ferment. This will range in time from 4-17+ hours, relying on room temperature and dough temperature (see weblog submit)
-
As soon as it has risen, tip the dough out onto your work floor and carry out a pre-shape, the place you need it to be in a taught ball of dough.
-
Cowl the dough and relaxation for half-hour
-
Form once more, and add right into a floured banneton. Cowl, and relaxation within the fridge for 12-48 hours, till you’re able to bake
-
Preheat the oven to 230ºc (fan assisted) and add a baking dish to the oven to preheat as properly (45 minutes)
-
Tip the dough onto a silicone matt or baking parchment and carry out an growth rating
-
Add to the this to the preheated baking dish, with a couple of cubes of ice, and bake for half-hour, lined.
-
Take away the lid, and bake for an additional 10-20 minutes
-
Take away from the oven and pot and relaxation for minimal of an hour earlier than slicing
- That is only a easy recipe information for this easy sourdough loaf. Full element in weblog submit!