
*This submit could include affiliate hyperlinks. Please see my disclosure for extra particulars!*
Easy methods to make a sourdough starter: a ten day information on find out how to make a sourdough starter from scratch
Initially this collection of days was simply going to be a social media video collection, however so a lot of you’ve gotten requested for a written model – so right here it’s. Every day has a youtube shorts video linked so you may have a visible when you want it.
Making a sourdough starter from scratch can really feel a bit of intimidating at first, nevertheless it’s truly a gradual, easy, and really rewarding course of. Over the course of 10 days, I documented precisely what occurred to my starter, what I fed it, and what modifications to anticipate alongside the best way.
This weblog submit pulls all the things collectively into one place so you may comply with alongside day-to-day and develop your individual bubbly sourdough starter at house… I promise you it’s value it for all the bakes you may make with sourdough and discard.
Making a starter
There are SO many alternative methods, strategies and concepts on what it is best to and shouldn’t do when making a sourdough starter, and even baking sourdough. If you happen to discover one thing that works for you, that’s completely high-quality – you go for it.
I saved issues deliberately easy through the use of a 1:1:1 ratio all through (equal elements starter, flour, and water by weight, aside from day one). Smaller portions are preferrred originally since you’ll be discarding each day, and this retains waste to a minimal.
There are notes/feedback/and so forth on all the movies I’ve accomplished for this collection up to now – but in addition, be happy to go away any under.
Day One
Day one is all about creating the atmosphere for fermentation to start out. There’s no starter but, it’s simply simply flour and water. (Watch my how-to video right here for day one)
I blended 20g sturdy white bread flour with 20g water till it fashioned a thick paste. This went right into a clear jar with the lid positioned loosely on prime. You don’t wish to seal it utterly; the starter must breathe.
A useful tip at this stage is weighing your empty jar earlier than you start. This makes discarding and feeding a lot simpler afterward. As soon as blended, the jar is left at room temperature for twenty-four hours. Nothing dramatic will occur but, and that’s utterly regular.
I used a grocery store’s personal sturdy white bread flour, with a protein proportion of 13% (the upper protein the higher often) and I used water that had been filtered (as I reside within the south of the UK and the water is at all times ridden with limescale) that’s at room temperature.
That is the starter set I used to be given over Christmas, and it’s an excellent place to start out.
Day Two
On day two, you introduce feeding. Even when the starter appears precisely the identical as yesterday, don’t panic. (Watch my how-to video right here for day two)
Discard sufficient starter to go away 20g within the jar, then feed it with 20g sturdy white bread flour, and 20g water. Combine again right into a thick paste, loosely cowl, and depart at room temperature once more. That is the rhythm you’ll repeat each day. At this stage, it’s all about consistency and belief within the course of.
It’s helpful to have weighed your jar on day one, so that you could simply do the maths of the starter. My jar weighed 318g, so I knew that I’d have 20g of starter left within the jar if I weighed it and it had 338g in it. High tip – throw the discarded stuff into the bin, you don’t need it to go down the drain.
Day Three
Day three can really feel uneventful. My starter confirmed little to no exercise, which is totally high-quality particularly in a chilly kitchen. Sourdough thrives on heat, so that is once I moved mine to a hotter spot (I used my microwave, with a mug of boiling water inside). (Watch my how-to video right here for day three)
The feed stayed the identical: 20g starter, 20g flour, 20g water. After discarding and feeding, I left it within the microwave with the mug of boiling water. Gradual and regular may be very a lot the sourdough approach.
Day 4
Lastly, some pleasure! On day 4, small bubbles began to look, and the scent shifted barely. It is a nice signal that one thing is occurring. (Watch my how-to video right here for day 4)
I continued feeding on the identical 1:1:1 ratio and returned the starter to a heat spot. If you happen to’re not seeing any exercise by this level, heat is often the important thing. You may as well verify your flour’s protein content material, strive filtered water, or experiment with a 1:2:2 ratio to provide the starter extra meals. Even tiny bubbles are a win!
Day 5
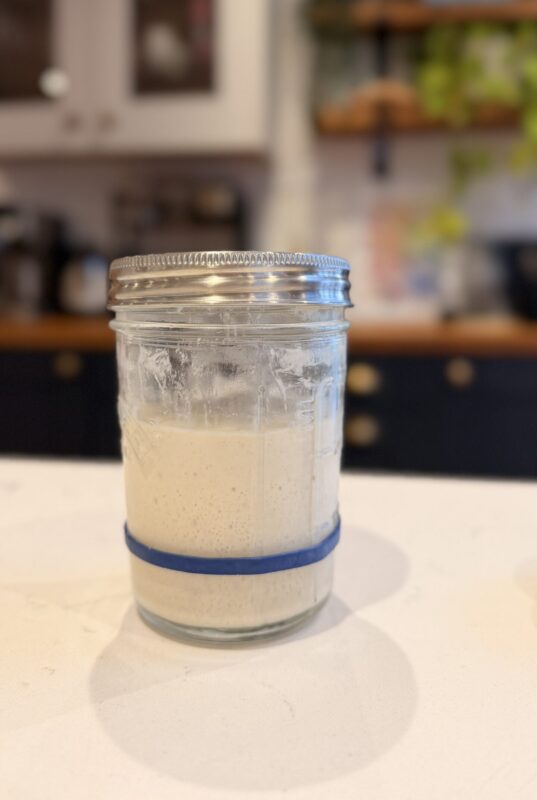
By day 5, some starters will likely be effervescent extra, whereas others are nonetheless taking their time. Each are utterly regular. Starters can take wherever from 7 to 14 days to change into absolutely lively. I often say it’s not less than 10-14 days, however it may be faster, particularly in a hotter nation or in hotter months (Watch my how-to video right here for day 5)
I caught with my common feeding routine and targeted on consistency… feeding on the identical time every day, protecting the jar loosely coated, and inserting it someplace heat. A reminder at this stage: at all times discard into the bin, not the sink, as starter could cause plumbing points.
Day Six
Day six is usually when issues begin to shift noticeably. Extra bubbles seem, the starter could rise barely, and that tangy, yeasty scent begins to develop. (Watch my how-to video right here for day six)
I fed as common and reminded myself that each starter behaves in another way. Some surge forward, others crawl however each can change into sturdy, wholesome starters with time and care.
Day Seven
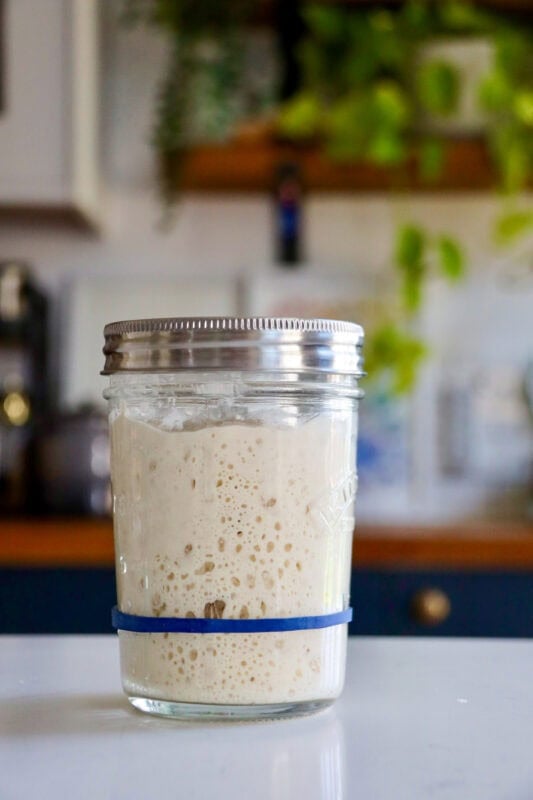
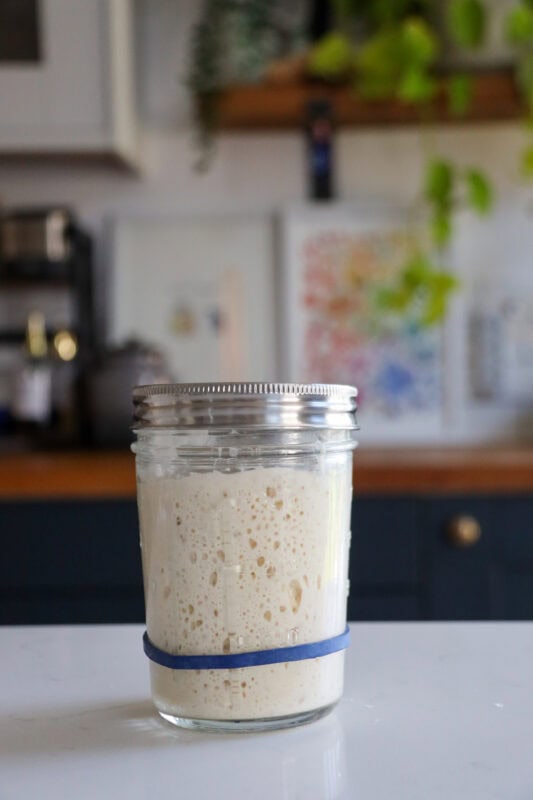
After every week, the starter actually began to point out persona. There have been loads of bubbles, a visual rise, and that traditional sourdough aroma. (Watch my how-to video right here for day seven)
At this level, it’s vital to do not forget that seven days doesn’t robotically imply “prepared.” The important thing milestone is consistency: your starter ought to be capable of double in dimension inside 4 to six hours of feeding, three days in a row. If you happen to’re not there but, maintain going. Usually previously when I’ve accomplished something with sourdough, a brand new/weaker starter can produce alright bread loaves, however older starters are higher.
Day Eight
On day eight, I fed my starter and waited, and it doubled in dimension once more. That is precisely what you wish to see. Every day feeds continued, and all the things pointed towards a starter that was almost able to bake with. (Watch my how-to video right here for day eight)
Ready might be irritating, however these bubbles and that rise are proof that your starter is waking up fantastically. At this stage, you may additionally realise… it deserves a reputation.
Day 9
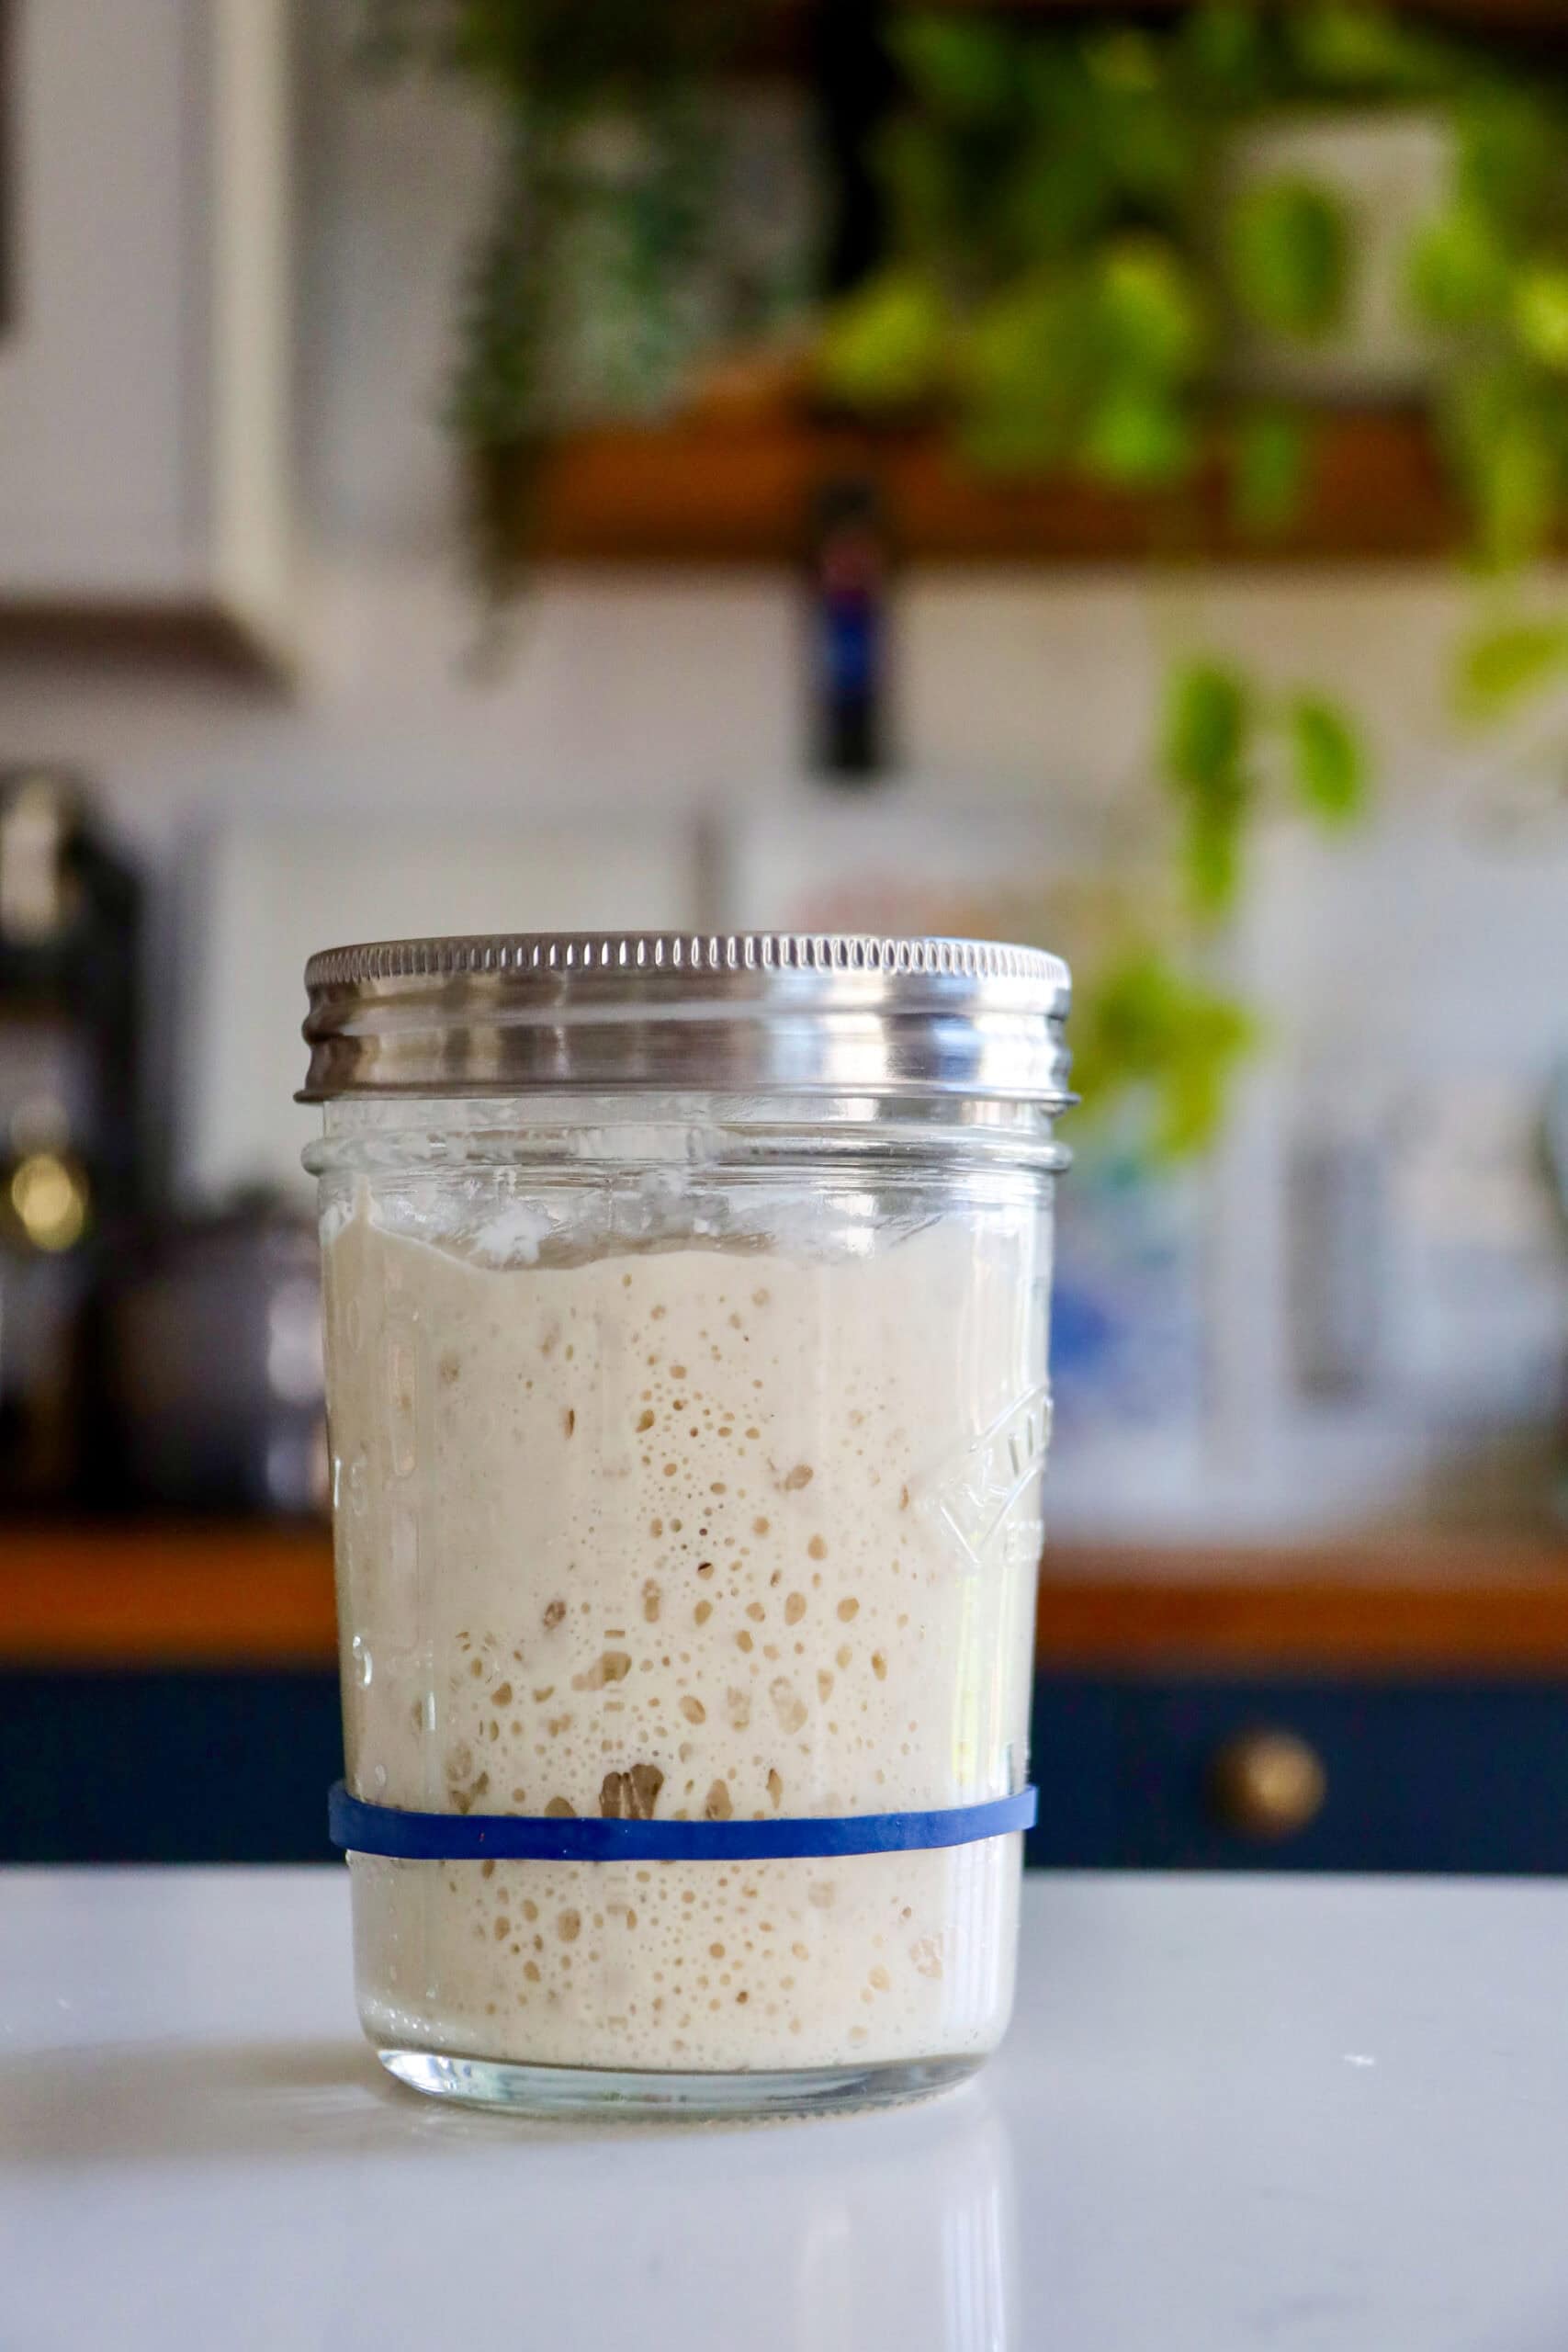
By day 9, my starter had doubled in quantity inside six hours for the third day in a row. That consistency meant it was sturdy sufficient for a check bake. (Watch my how-to video right here for day 9)
That stated, a barely older starter typically performs higher, and I personally want a ten to 14 day starter for dependable outcomes. Feeding continued as regular, with plans to maintain strengthening it over the subsequent few days.
Day Ten
Day ten was all about admiring the construction. After feeding, the starter rose fantastically, with seen bubbles and energy all through. That is what a wholesome starter appears like. (Watch my how-to video right here for day ten)
In case your starter isn’t fairly right here but, don’t fear. Temperature, flour, water, and timing all play a task. Discovering what works for you is a part of the sourdough journey
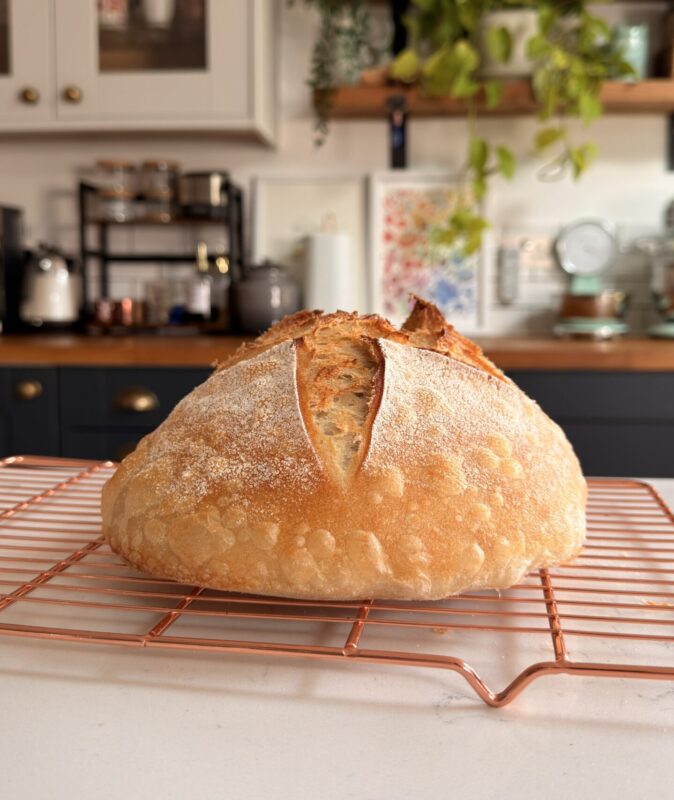
From right here, you can begin attempting to bake whether or not that’s a easy loaf, recipes utilizing discard, or experimenting with totally different flours. Or, you may gasoline it for a number of extra days to strengthen it.
If you’re joyful along with your starter, however you aren’t able to bake but, you may retailer it within the fridge. This prevents the starter from dying and likewise you unnecessarily overdoing the feeding. If you end up able to bake, take the starter out of the fridge the day earlier than, and feed within the night so it’s able to go. I will likely be posting some sourdough movies sooner or later, so let me know if you wish to see something specifically.
Sourdough is a lesson in endurance, remark, and belief. Keep it up, feed it effectively, and earlier than lengthy, you’ll be pulling your individual home made sourdough from the oven!